Compressing your website during development and after launch is crucial.
Note: I develop custom WordPress themes from scratch, so when applicable, I’ll refer to ways to implement these techniques using WordPress.
This is increasingly important now that responsive design for mobile devices is the de facto standard. You can no longer simply use CSS media queries to reformat the layout to be more mobile-friendly and call it “done”. If we’re truly going for a “mobile first” experience, we need to make these websites lean and mean to give end users the best experience possible. Depending on your audience, the download size of your website could actually be costing your visitor money in the form of paid bandwidth. Check out this tool, whatdoesmysitecost.com, which illustrates the financial cost to access a website on a mobile network around the globe. I don’t think I’ll be moving to Vanuatu anytime soon.
For starters, try using Google Pagespeed Insights to evaluate your site performance while you develop to see if there’s things you could be doing differently. Here are a few ways I recommend to improve the performance of your website:
Stop using bloated WP themes and CSS frameworks
I can’t stress this enough. If you’re installing a commercial theme, it’s likely riddled with code and extra features that your site doesn’t require. The codebase is also likely overly complicated, so modification for performance boosts, or otherwise, becomes more difficult than it has to be. I highly recommend building WordPress themes from scratch. You should develop only the features you need, keeping the download heft to a minimum. The same goes for CSS Frameworks; sure you could use Foundation (50k, minified) or Bootstrap (123k, minified) to kickstart a project. I’ve been using the percentage-based Skeleton grid framework (11k, not minified), but not necessarily for its features, but for its lack of features. In this instance, less IS more.
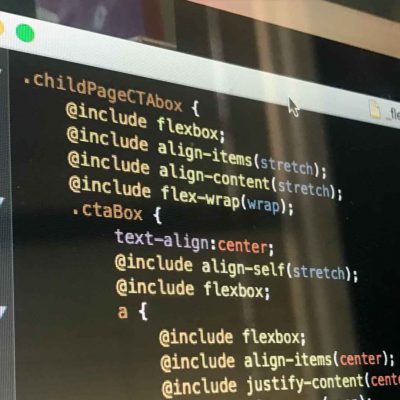
Use SASS to combine and compress your CSS
I prefer to abstract my CSS stylesheets into the particular purposes each plays. I separate all of my color, layout, typography, browser resets and other utilities into their own stylesheets – for organizational purposes. This makes finding and editing particular website features easy. I used to call each of these stylesheets separately in my projects, creating more http requests than necessary and slowing down the website in the process. I once saw Brad Frost speak at An Event Apart Chicago 2014 and he implored the group to use SASS to combine files to boost site performance. That’s when I decided to make the leap into a SASS workflow. At first, it was simply to aggregate all my stylesheets into one so I could get a performance boost, but as I became more comfortable with the syntax I started using SASS mixins and variable shorthands to speed up my process.
Here’s an example of how I organize and import separate stylesheets at the end of my style.scss file, which results in a single style.css file ready for enqueuing into my WordPress theme.
/* @group #SASS Import
================================================== */
@import 'bower_components/font-awesome/scss/font-awesome.scss';
@import 'sass/utilities/normalize';
@import 'sass/utilities/skeleton';
@import 'sass/wordpress-defaults';
@import 'sass/layout';
@import 'sass/typography';
@import 'sass/color';
@import 'sass/plugins/offcanvasmenu-skin';
/* @end */
You gnarly programmer-types might use SASS via command line, but as I see myself a designer first, and developer second, I prefer to use the CodeKit IDE to run my SASS processes. It’s got a boatload of other helpful tools you might want to poke around. If you’re interested in using this type of workflow, here’s a primer on SASS and the full documentation.
Compress Images outside of Photoshop
Sure, Photoshop is a great design tool – I’m not knocking it, whatsoever. It’s got an excellent interface for exporting graphics in a myriad of formats. But, we can do better. We can get those file sizes smaller. Try testing Google Pagespeed Insights on a website you just built. Google will call you out if you’re serving up images that could be smaller in file size. Don’t fret, because there are a few ways to address this.
- Compress the images in your WordPress theme directory. I’ve recently been doing this in a couple of ways. CodeKit (mentioned above) has a lossless image optimization feature. Don’t use CodeKit? I’ve got you covered… ImageOptim is a great, no-frills, drag-and-drop lossless image compression utility. Use it often.
- Compress images uploaded to WordPress’ Media Library. Easy, provided your server has the necessary extensions. EWWW Image Optimizer plugin for WordPress will crunch the original and generated images, as well as theme and plugin image files. Give it a try.
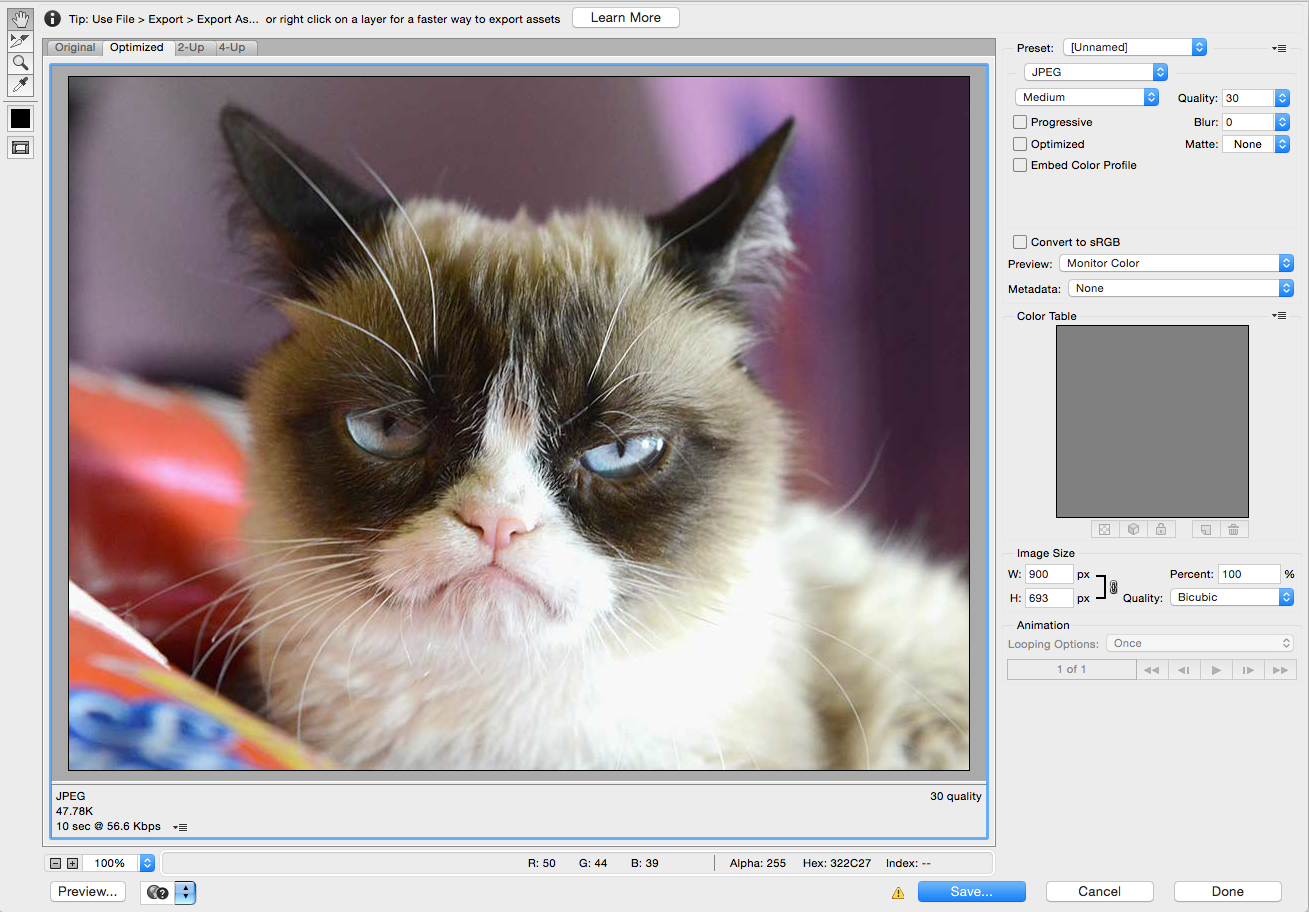
Saving this photo of Grumpy Cat out of photoshop with medium jpeg compression settings results in a 49k file size when saved to my hard drive.

After exporting Grumpy Cat from Photoshop, I optimized the resulting jpeg with ImageOptim and squeezed an extra 2k out of it, for a whopping 5% savings. That doesn’t seem like much with just one file, but factor in multiple files and a 4G mobile phone connection, and you’ve just given your mobile experience a a decent performance boost.
You’ve launched your site, now what?
Okay, so you’ve launched your new WordPress website… now what? Your job’s not done. You’ve still got to cache and optimize. I don’t normally recommend plug-ins for core features of websites, but in the case of caching, compression and optimization, I tend to lean on the WordPress plugin repository. Here are some I’ve used over the years.
- Install and use a cache plugin. There are many available options, but I prefer to use WP Super Cache. Let’s say you recently updated your website, did an email blast or social media post, and 100 users hit your website at once. The first visitor visits your site, queries the database and builds a static HTML file. The following 99 skip the query and just load the static HTML file. Without caching installed, it’s highly likely your site could have crashed. If you’re not caching your site, install WP Super Cache, or something similar, and use it.
- Gzip Compression. Make sure your server is using Gzip compression. It can reduce the size of your http response by about 70%. You can do this manually via .htaccess or you can try running a WordPress plugin like Gzip Ninja Speed Compression. You may need look up additional Gzip compression htaccess rules for specific file formats you’re using. If you’re not sure if Gzip is activated on your server, use this handy website checker over at GzipWtf.com. Google Pagespeed insights will let you know if any particular file formats are not Gzipped. This HTML5 boilerplate has a nice .htaccess file with quite a few media types specifically called out for Gzip compression.
AddOutputFilterByType DEFLATE "application/atom+xml"
"application/javascript"
"application/json"
"application/ld+json"
"application/manifest+json"
"application/rdf+xml"
"application/rss+xml"
"application/schema+json"
"application/vnd.geo+json"
"application/vnd.ms-fontobject"
"application/x-font-ttf"
"application/x-javascript"
"application/x-web-app-manifest+json"
"application/xhtml+xml"
"application/xml"
"font/eot"
"font/opentype"
"image/bmp"
"image/svg+xml"
"image/vnd.microsoft.icon"
"image/x-icon"
"text/cache-manifest"
"text/css"
"text/html"
"text/javascript"
"text/plain"
"text/vcard"
"text/vnd.rim.location.xloc"
"text/vtt"
"text/x-component"
"text/x-cross-domain-policy"
"text/xml"
- Leverage Browser Caching. You can instruct the browser to cache files for a specified amount within your htaccess file, so a user doesn’t have to constantly reload the same resources. The HTML5 boilerplate, mentioned above, has some useful browser caching declarations. You can also try something like the Leverage Browser Caching Ninjas plugin for WordPress.
ExpiresActive on
ExpiresDefault "access plus 1 month"
# CSS
ExpiresByType text/css "access plus 1 year"
# Data interchange
ExpiresByType application/atom+xml "access plus 1 hour"
ExpiresByType application/rdf+xml "access plus 1 hour"
ExpiresByType application/rss+xml "access plus 1 hour"
ExpiresByType application/json "access plus 0 seconds"
ExpiresByType application/ld+json "access plus 0 seconds"
ExpiresByType application/schema+json "access plus 0 seconds"
ExpiresByType application/vnd.geo+json "access plus 0 seconds"
ExpiresByType application/xml "access plus 0 seconds"
ExpiresByType text/xml "access plus 0 seconds"
# Favicon (cannot be renamed!) and cursor images
ExpiresByType image/vnd.microsoft.icon "access plus 1 week"
ExpiresByType image/x-icon "access plus 1 week"
# HTML
ExpiresByType text/html "access plus 0 seconds"
# JavaScript
ExpiresByType application/javascript "access plus 1 year"
ExpiresByType application/x-javascript "access plus 1 year"
ExpiresByType text/javascript "access plus 1 year"
# Manifest files
ExpiresByType application/manifest+json "access plus 1 week"
ExpiresByType application/x-web-app-manifest+json "access plus 0 seconds"
ExpiresByType text/cache-manifest "access plus 0 seconds"
# Media files
ExpiresByType audio/ogg "access plus 1 month"
ExpiresByType image/bmp "access plus 1 month"
ExpiresByType image/gif "access plus 1 month"
ExpiresByType image/jpeg "access plus 1 month"
ExpiresByType image/png "access plus 1 month"
ExpiresByType image/svg+xml "access plus 1 month"
ExpiresByType image/webp "access plus 1 month"
ExpiresByType video/mp4 "access plus 1 month"
ExpiresByType video/ogg "access plus 1 month"
ExpiresByType video/webm "access plus 1 month"
# Web fonts
# Embedded OpenType (EOT)
ExpiresByType application/vnd.ms-fontobject "access plus 1 month"
ExpiresByType font/eot "access plus 1 month"
# OpenType
ExpiresByType font/opentype "access plus 1 month"
# TrueType
ExpiresByType application/x-font-ttf "access plus 1 month"
# Web Open Font Format (WOFF) 1.0
ExpiresByType application/font-woff "access plus 1 month"
ExpiresByType application/x-font-woff "access plus 1 month"
ExpiresByType font/woff "access plus 1 month"
# Web Open Font Format (WOFF) 2.0
ExpiresByType application/font-woff2 "access plus 1 month"
# Other
ExpiresByType text/x-cross-domain-policy "access plus 1 week"
- Combine and Compress your CSS and Javascripts. WordPress themes and plugins, if built properly, should enqueue their CSS and Javascript. This means WP is aware of them, and you can manipulate them. To do this, I’ve been employing BWP Minify to reduce the number of server requests. For example, let’s say you have 20 separate scripts enqueued between your theme and the installed plugins. If you concatenate and minify those into just two http requests, you’re making far less server requests while drastically improving your site’s performance.
- Compress your HTML output. I’d love to know why this plugin, HTML Minify, is not in the official WordPress repository. Seriously. It’s one of my secret weapons. Install it, and it removes all the extra space from your HTML output. Pro tip: I tend to use inline javascripts within the footer of my templates. With this plugin, I’ve had better results instructing it not to compress the inline javascript. Easy peasy.
- Keep testing on Google Pagespeed Insights. As you work on site optimization, keep testing it to see if performance has gotten better, or worse, or if it’s pointing out things I may have missed. This is crucial, as every website and server is a little different.
Don’t stop optimizing. You can always do more. Here’s some further reading.